Kitchen Renovation Plumbing: The Complete North Shore Homeowner’s Guide
A kitchen renovation stands as one of the most transformative home improvement projects a homeowner can undertake. Upgrading cabinetry, selecting marble countertops, and picking out high-end focal appliances naturally command immediate attention during the initial design phase. However, the true functional foundation of any high-performing kitchen lies hidden beneath your floors and inside your walls: your kitchen renovation plumbing layout.
Whether you are remodeling a historic colonial residence in Highland Park or modernizing a lakeside property along the North Shore, evaluating your pipe routes, drain capacities, and gas lines early prevents costly delays. Proper rough-in planning ensures that luxury fixtures like commercial-grade prep sinks, pot fillers, and high-efficiency dishwashers operate seamlessly without pressure drops or drainage backups.
In this comprehensive guide, we walk through essential plumbing considerations, structural layout choices, local building code requirements, and expert tips to ensure your dream kitchen delivers reliable performance for decades to come.
Direct Overview: Core Kitchen Renovation Plumbing Considerations
Before tearing down drywall or placing cabinet deposits, review this quick reference breakdown detailing critical plumbing updates, structural considerations, and project impact:
| Renovation Element | Primary Plumbing Requirement | Typical Structural Impact | Key Value & Risk Mitigation |
| Sink Relocation / Kitchen Islands | Subfloor drain sloped run & new vent stack | Requires subfloor access or concrete trenching | Eliminates slow drainage & sewer gas back-siphonage |
| High-BTU Gas Range Upgrade | 3/4-inch gas line extension or pressure regulator | Framing wall penetrations & shut-off valve install | Guarantees safe gas volume without fuel starvation |
| Luxury Refrigerators & Ice Makers | Dedicated 1/4-inch copper water supply & shut-off | Recessed wall box behind appliance cavity | Prevents hidden water leaks & cabinet mold damage |
| Pot Filler Installation | Cold water rough-in directly above cooktop | Vertical wall piping & dual-valve shut-off controls | Adds culinary convenience while protecting backsplash |
Why Early Plumbing Layout Planning Matters
It is a common pitfall to view plumbing as a finish-phase trade where pipes simply hook up to chosen fixtures at the end of a build. In reality, mechanical rough-ins dictate where fixtures can safely sit long before final finishes arrive.
Avoiding Costly Mid-Project Change Orders
Moving a main sink just three feet across a room seems minor on a two-dimensional floor plan. However, below the subfloor, that move requires recalculating drain slope typically a minimum 1/4-inch drop per linear foot and extending atmospheric vent pipes through upper stories or out side walls. Identifying these mechanical realities during initial architectural drafting keeps budget allocations predictable and eliminates mid-construction stop-work orders.
Protecting Fine Cabinetry from Hidden Water Damage
Custom kitchen millwork represents a massive share of your overall renovation budget. Improperly installed drain traps, unvented island sinks, or pressurized supply lines squeezed tightly behind cabinet backs create slow, unnoticed leaks. By prioritizing proper mechanical clearances, high-grade shut-off valves, and code-compliant drain venting, you shield your financial investment against rot, warping, and structural mold.
Key Plumbing Components of a Modern Kitchen Overhaul
Every kitchen fixture depends on a balanced network of pressurized supply lines and gravity-fed drainage systems. Upgrading these components simultaneously during a remodel delivers peak water pressure and whisper-quiet drainage.
Kitchen Water System Flow:
[Main Supply Line] ➔ [Pressure Regulator & Shut-Off Valve] ➔ [Fixture Rough-In] ➔ [Fixtures & Appliances] ➔ [P-Trap & Air Gap Venting] ➔ [Main Sanitary Drain]
Sink and Garbage Disposal Rough-Ins
The primary kitchen sink serves as the busiest workstation in your home. Modern kitchen designs frequently incorporate deep undermount basins, workstation sinks with built-in accessories, or secondary prep sinks on central islands.
- Drainage Sizing: High-capacity garbage disposals and multi-basin sinks require 1.5-inch or 2-inch PVC/ABS drainage pipes to prevent grease and fibrous food blockages.
- Island Venting Solutions: Because island sinks lack a standard back-wall stud cavity to run a traditional vertical vent pipe, plumbers install specialized loop vents or Air Admittance Valves (AAVs) to maintain equalized air pressure for rapid draining.
Appliance Water and Gas Hookups
Modern appliances demand precise utility rough-ins to operate efficiently without crowding surrounding cabinetry:
- Dishwasher Drainage: Dishwashers must feature a high-drain loop or counter-mounted air gap to prevent contaminated sink wastewater from siphoning back into clean dish loads.
- Built-in Coffee Makers & Ice Machines: Dedicated filtration connections ensure pristine water clarity and prevent mineral scale from damaging internal heating elements.
- Gas Line Extensions: Upgrading to professional chef ranges often necessitates expanding legacy 1/2-inch gas lines to 3/4-inch piping to supply adequate British Thermal Units (BTUs).

When to Relocate Plumbing vs. Working with Existing Footprints
Homeowners frequently wonder whether shifting their kitchen layout is worth the additional plumbing expense. The answer hinges on your floor structure and access points.
Layout Cost Factor:
[Existing Footprint / Same Wall] ➔ Low Complexity & Minimal Structural Demo
[Relocating Along Outer Walls] ➔ Moderate Complexity (Piping & Insulation Exposure)
[Moving Sink/Appliances to Island] ➔ Highest Complexity (Subfloor Access & Special Venting Required)
Keeping the Existing Mechanical Footprint
If your structural floor plan already offers optimal traffic flow, keeping the sink, dishwasher, and refrigerator in their current locations dramatically reduces mechanical rough-in costs. Your plumber can focus funds on replacing aging galvanized steel or copper lines with clean PEX piping, adding modern emergency shut-off valves, and replacing outdated drain traps.
Moving Water and Waste Lines to New Walls
If your design opens up closed walls or creates an open-concept living space, shifting plumbing lines is completely doable. Houses built over unfinished basements or crawlspaces offer straightforward floor access, allowing technicians to re-route drain lines and supply pipes efficiently. Conversely, homes built on concrete slab foundations require precision concrete cutting and trenching to embed new waste lines a factor that should be accounted for early in your planning timeline.
Local Building Codes, Permitting, and Plumbing Inspections
Plumbing modifications during a kitchen renovation are strictly governed by municipal health and safety codes. Navigating these requirements protects both your safety and your home’s future resale value.
Municipal Permits and Safety Standards
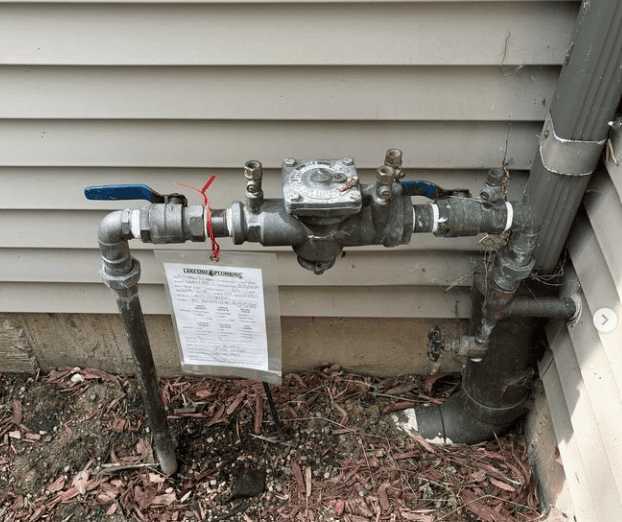
Before tearing into plumbing lines, certified plans must be submitted to local building departments. These municipal standards regulate everything from gas pipe materials to backflow prevention device placements. According to national water distribution and mechanical codes published by the International Association of Plumbing and Mechanical Officials (IAPMO), adherence to standardized pipe sizing and backflow prevention protects home drinking water from cross-contamination.
Work conducted without required permits can trigger steep fines, force homeowners to open up finished drywall for retroactive inspections, or even jeopardize real estate transfers during future sales inspections.
The Inspection Timeline
A typical kitchen remodel includes two distinct plumbing inspection phases:
- Rough-In Inspection: Occurs after all supply, gas, and drain pipes are installed within open wall framing, but before insulation, drywall, or cabinetry are installed. Pipes are pressure-tested with water or air to verify zero leaks.
- Final Inspection: Conducted after cabinetry, countertops, sinks, faucets, and appliances are fully installed and operational. The inspector verifies proper drain traps, leak-free connections, fixture function, and emergency shut-off accessibility.

Essential Upgrades to Consider During Your Remodel
When your walls are open, adding forward-thinking mechanical features costs a fraction of what it would take to retrofit them down the road.
Whole-House or Under-Sink Water Filtration
Integrating a dedicated filtration setup directly into your kitchen renovation plumbing layout guarantees clean, odor-free water right from your primary faucet. Whether choosing a point-of-use Reverse Osmosis (RO) unit under the prep sink or connecting a whole-home filtration system, removing chlorine, sediments, and heavy minerals preserves fixture finishes and enhances drinking water taste.
Automatic Water Shut-Off Valves and Leak Sensors
Installing smart leak detection valves directly onto main supply lines adds modern protection. These smart systems monitor flow volume and automatically shut off water incoming to the home the second an unexpected line rupture or continuous drip is detected saving custom floors and cabinetry from catastrophic flooding.